One of the disadvantages of working from places like the library and the train is that the wireless network connections aren’t exactly secure. For casual browsing, that’s not terribly important, but even for stuff like Facebook and GMail it would be nice to have a way of ensuring the connection is secure. Unfortunately, it’s not always possible or practical to use HTTPS connections for such things.
The obvious solution is a secure point-to-point connection to another machine on a wired network – in other words a VPN. The secured machine will act as an IP routing gateway, so that any insecure traffic that is intercepted will appear to be coming from that machine.
While I was at the library yesterday I created just such a setup using OpenVPN. As usual, it was more complicated to configure than I’d anticipated.
Setup steps. First the server:
1) Install openvpn on the server. Since my server is Fedora, this consists of installing the package via Yum.
$ sudo yum install openvpn
2) Create and install the security certificates and keys needed to authenticate the logins.
$ cd /usr/share/openvpn/easy-rsa/2.0
$ vi vars(edit the last 5 lines, so that KEY_COUNTRY, KEY_PROVINCE, KEY_CTY, KEY_ORG and KEY_EMAIL are correct)
$ . ./vars
$ ./clean-all
$ ./build-ca
$ ./build-key-server server
$ ./build-key user1
$ ./build-key user2… (do this for however many users you expect to have)
$ ./build-dh
$ mkdir -p /etc/openvpn/keys
$ mv ca.crt server.crt server.key dh1024.pem /etc/openvpn/keys
3) Create the server configuration file and save in /etc/open/server.conf. Here’s what mine looks like:
# server’s IP address
local 72.xx.xx.xxx
# this is the port number assigned by IANA for OpenVPN
port 1194
# use UDP – much better performance than TCP in this case
proto udp
# use the tun device for a routed IP tunnel
dev tun
# location of the server certificate
ca key/ca.crt
cert key/server.crt
# location of the server key
key server.key
# location of the Diffie-Hellman key parameter
key/dh1024.pem
# IP address and subnet mask of the VPN’s virtual network
server 10.8.0.0 255.255.255.0
# DHCP options to push to OpenVPN clients including domain and DNS servers (OpenDNS in this case)
push “dhcp-option DOMAIN local.mydomain.com”
push “dhcp-option DNS 208.67.222.222”
push “dhcp-option DNS 208.67.220.220”
push “redirect-gateway def1”
# allow direct client-to-client communication on the VPN
client-to-client
# allow each side to check every 10 seconds if the link is up
keepalive 10 120
# run openvpn as this user/group
user nobody
group nobody
# log to specified file
log openvpn.log
4) Enable IP gateway services on the server, using iptables. Note that you MUST make sure that iptables is not blocking the OpenVPN port on the internal VPN network. I spent over an hour trying to figure out why no traffic was ever being received by the server. I thought I’d disabled the firewall for the internal network – apparently not!
$ iptables -t nat -A POSTROUTING -s 10.8.0.0/24 -o eth0 -j MASQUERADE
$ echo 1 > /proc/sys/net/ipv4/ip_forward
5) Start the server. In Fedora nomenclature, the means:
$ /etc/init.d/openvpn start
Meanwhile on the client things are easier:
1) Securely copy over the client keys to the client. I used scp.
mkdir -p /etc/openvpn/keys
scp user@server.com:/usr/share/openvpn/easy-rsa/2.0/client1.* /etc/openvpn/keys/
scp user@server.com:/usr/share/openvpn/easy-rsa/2.0/ca.crt /etc/openvpn/keys/
2) Create the client configuration in /etc/openvpn/client.conf. Here’s mine:
tls-client
remote 72.xx.xx.xx 1194 udp
redirect-gateway def1
pull
dev tun
ns-cert-type server
ca ca.crt
cert client1.crt
key client1.key
nobind
ping 60
ping-restart 120
persist-key
persist-tun
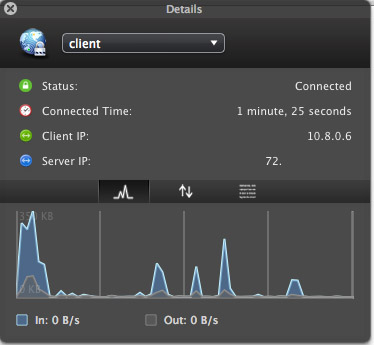
3) Start the client. Since I’m on a Mac, I used the OpenVPN GUI Viscosity, which allows you to directly import your client.conf and keys.
P.S. So how do you know that it worked? Install WireShark. You’ll notice that almost all the traffic is now UDP traffic, and that there are no recognizable packets beyond an occasional DHCP request on the local interface.
