Here’s a simple example demonstrating some of the major syntax differences between Microsoft’s assembler and the free nasm assembler. It mainly implements the suggestions here.
Using nasm on MacOS X
Nasm is a cross-platform x86 assembler and functions largely the same on MacOS X as it does on Linux. However as I discovered porting some of my code, there are some quirks and slight changes required, compared to working with nasm in Linux.
Using nasm/Along32 instead of masm/Irvine32
Kip Irvine’s x86 assembly book is a good introduction to assembly. However, it requires using Visual Studio on Windows, both for the syntax and more importantly for the Irvine32 support library that the examples require. Happily, some folks have put together a Linux port of that library called Along32 and so using the crossplatform nasm assembler, one can make nearly full use of the book on Linux.
Below are the basic instructions for using nasm and this library.
Moving x86 assembly to 64-bit (x86-64)
While 64-bit x86 processors have now been on the market for more than 5 years, software support is only slowly catching on. 64-bit x86, or x86-64 as its inventors at AMD called it, not only offers programmers the ability to manipulate and address data in larger chunks, but added some other niceties like an additional 8 general purpose registers.
Transitioning assembly code from x86 to x86-64 is pretty straightforward, but there are some changes worth noting.
Converting x86 assembly from masm to nasm
Masm, the Microsoft assembler, is the most commonly taught x86 assembler. Unfortunately, its use is limited to Windows. nasm is a free cross-platform x86 assembler which supports all the common x86 operating systems – Linux, MacOS X and Windows. Unlike the GNU assembler, it uses the same Intel syntax that masm does. Still, there are some differences.
What follow are my notes on converting x86 assembly code from use with mas to nasm.
I have also posted a simple example highlighting some of those changes.
The Great Camera Con
Digital cameras are responsible for many wonderful things. They let us capture manner of events that were not practical or possible before. They enable us to post-process and alter our images quickly and easily. They make it possible to share our images with just about anybody at no cost and little effort.
What they have not done, at least for serious amateurs, is save us money over their film predecessors. This of course flies in the face of conventional wisdom. No more buying film. No more paying the drugstore to process our images (or buying the chemicals and equipment and processing them ourselves). No more paying for prints of every image on a roll of film. Etc.
Climbing Summary
I’ve climbed a number of peaks since 2002. Here is the list. Those done with the Peak Climbing Section are marked (PCS).
Is this thing on?
Well, this is a little embarrassing. No updates in almost a year.
Actually, I have been fairly busy, but not in ways that have lent themselves to posting here. Hopefully, that is changing.
In the meantime, for a peek into my current side projects, have a gander at www.openhorizonsphoto.com. My main camera just passed the 45,000 shot mark. Many more photos to post, when I get the chance!
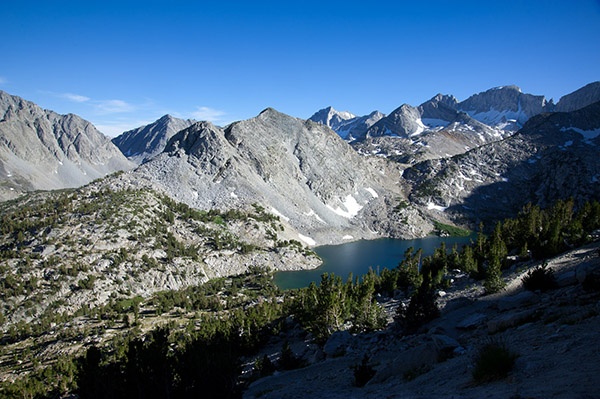
Trans-Sierra Day Hike: Rock Creek to Lake Edison and back

Summary: From Mosquito Flat in the Little Lakes Valley, we followed the trail up over Mono Pass, and then descended down the main drainage to Lake Edison where we spent the night at the Vermilion Valley Resort. The next day we retraced our steps.
Participants: Chris, Dara, Fred and Sassan
Distance: Approx. 20 miles each way.Elevation: Westbound: 2400 ft. up, 4400 ft. down.
Mt. Shasta (take 2)

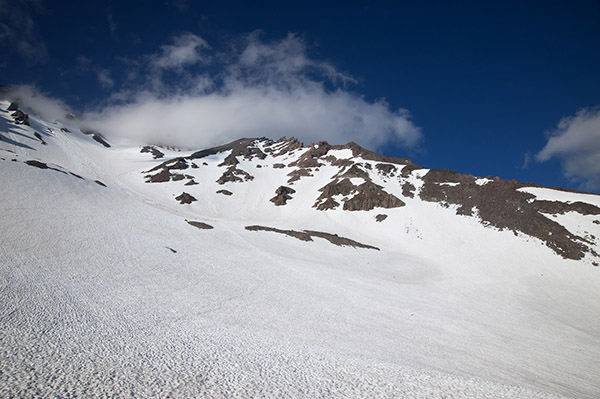
Mt. Shasta Take 2 – Avalanche Gulch
Participants: Chris, Dara and Sassan
Distance: Approx. 7 miles each way
Elevation: 7100 ft. up
In mid-June, we were part of George’s Shasta PCS trip. Before bad weather cut that adventure short, the climbing ranger had told us that conditions for the climb would likely be best about 4 weeks later. Most couldn’t make the date, but the 3 of us were free and decided to give it a go. To give ourselves the best chance of success (Sassan and I never having summited before), we planned to hike up to Helen Lake on the first day, and do our climb from there. In retrospect, a few weeks earlier would probably have been better, as the lower part of the mountain didn’t have much snow, which made progress, particularly the decent, slower than necessary. Happily we had no issues with the weather this time around.
